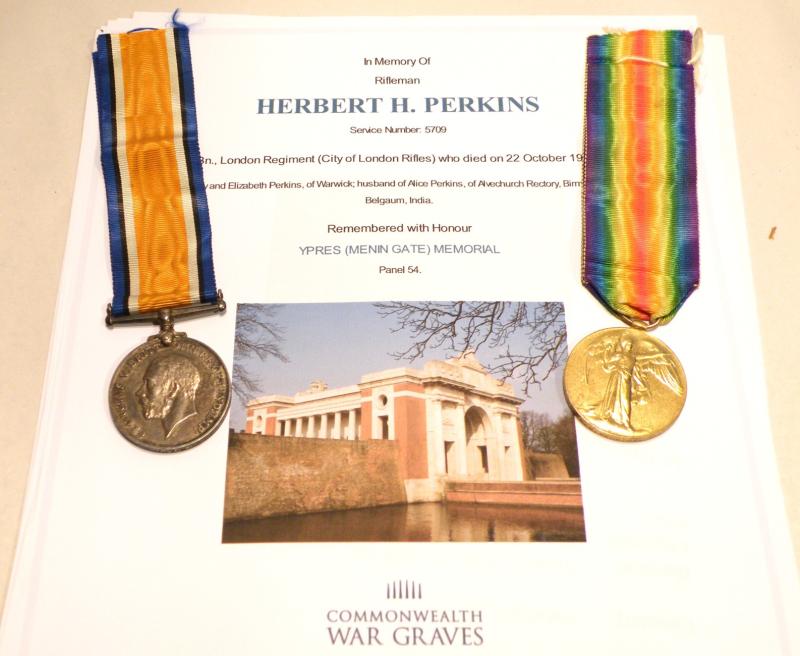
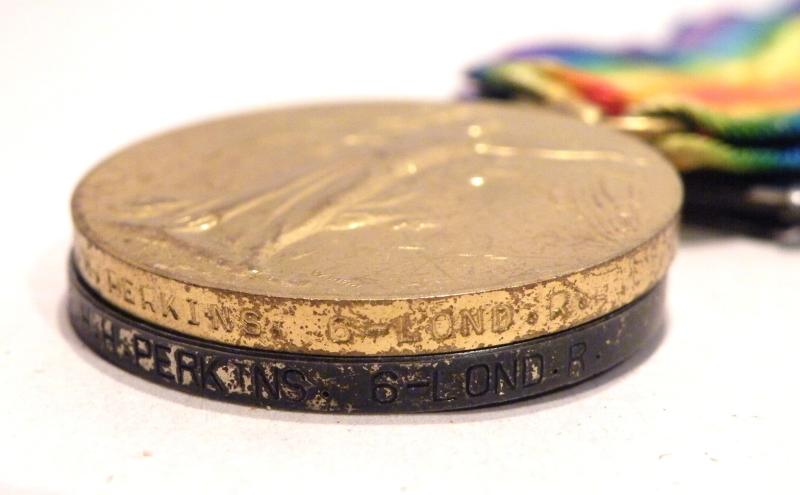
WW1 Medal Pair to Perkins 6th London Reg. KIA 1916.
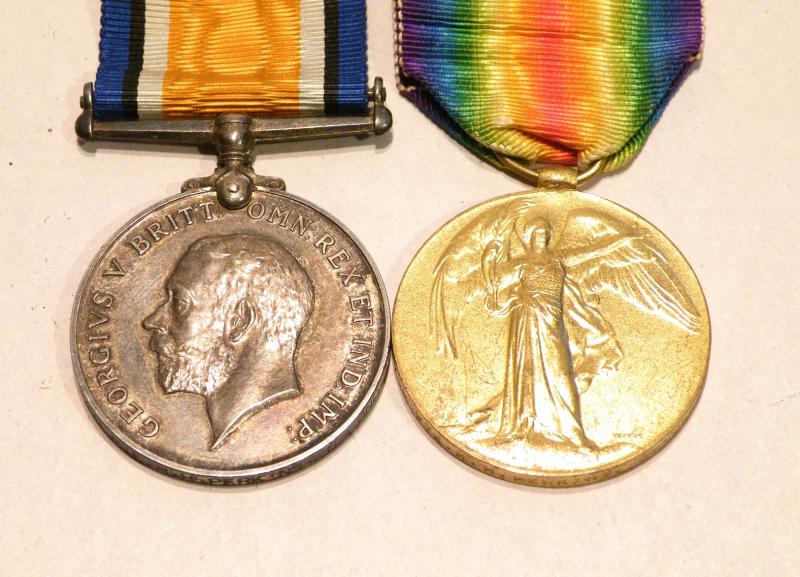
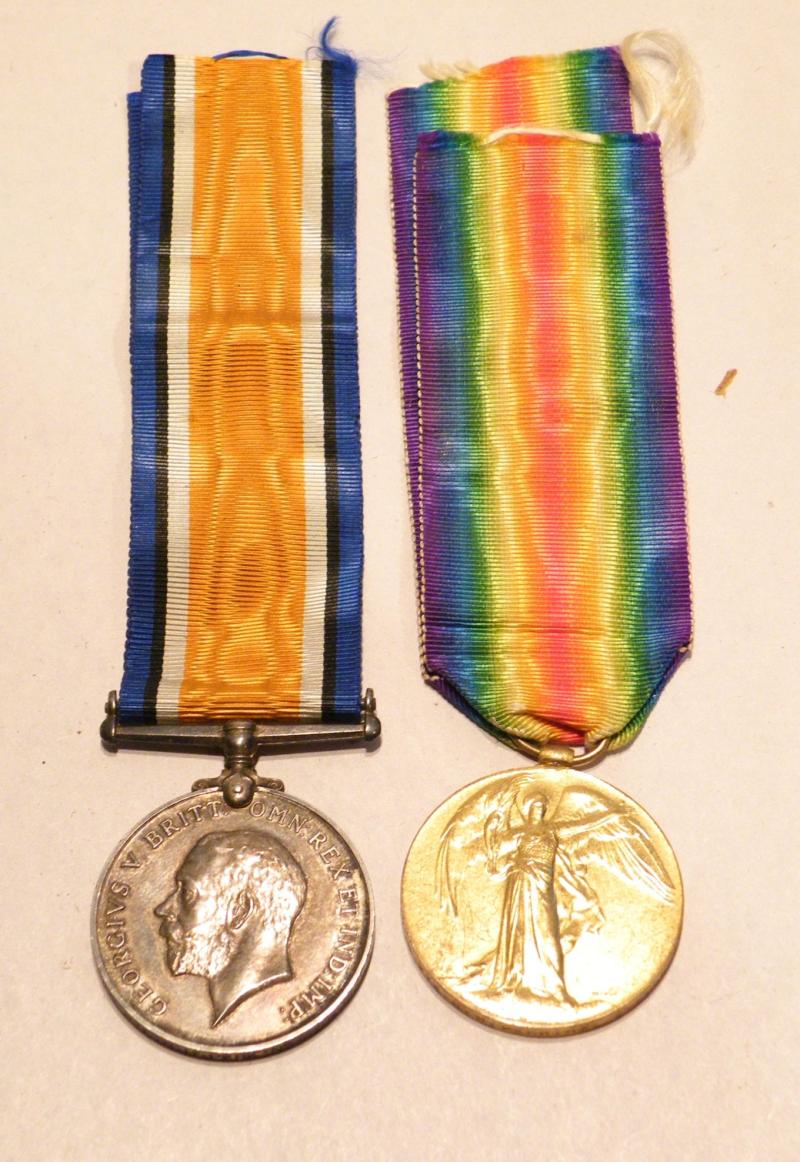
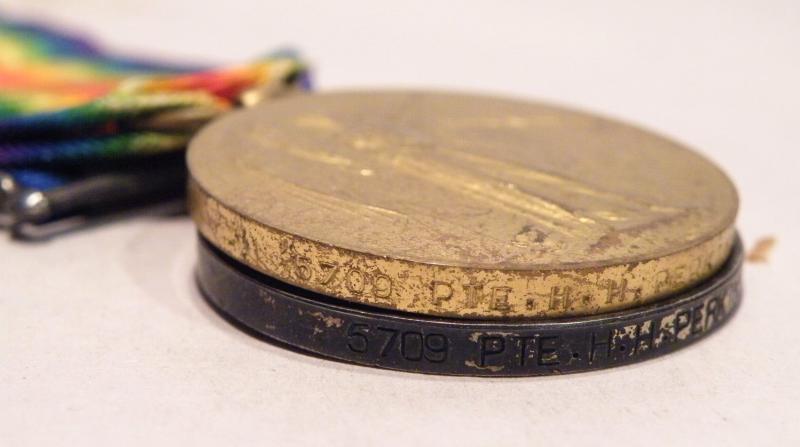
A Poignant WW1 British war and victory medal correctly named to 5709 Rifleman Herbert Harold Perkins of the 6th Battalion London Regiment, City of London Rifles.
Herbert Perkins was born in India 1886, his father Sidney Perkins was a Serjeant with the Royal Warwickshire regiment.
Herbert was employed as a Domestic Gardener before the war, working and living in Kensington London, marrying Alice in 1913. Although the battalion landed in France in 1915 it is likely that Herbert was sent to France on a later transport, possibly as late as 1916, but served with the 140th Brigade in 47th (2nd London) Division.
Herbert may have been involved in the German attack on Vimmy Ridge but I cannot confirm that, however he was present at the actions at Flers-Courcelette, in which the division captured High Wood in September 1916. But what is significant is the actions in October 1916 when the battalion was in the Hill 60 area, the Bluff sector to the Zwartelen Spur, north of the Ypres-Comines railway. Here they saw heavy fighting from day one, with the involvement of tanks silencing the heavy machine gun fire when advancing from the Flers Line. On October 4th, the 140th Brigade took over the line from the 141st Brigade in preparation for another general attack. On the next day the 6th Battalion gained an important point by occupying the old mill 500 yards west of Eaucourt I’Abbaye.
The attack of October 7th was on a three-division front. 47th to the centre, on the right was the 41st, and on our left the 23rd Division. The main German line of defence opposite us was the Grid Line, running north-west from Gueudecourt to Warlencourt, and including the Butte de Warlencourt, an ancient mound of excavated chalk, about 70 feet high, which had been tunnelled by the enemy, and used as an observation post from which machine-gun and artillery fire was directed with devastating effect on the western slopes up which our men had to advance. Anticipating an attack on this important line, the Germans had dug a new trench across our front over the high ground north of Eaucourt I’Abbaye, westward into the valley. This trench named ‘Diagonal’ was the first objective of the 140th Brigade; their final objective was the Grid Line, including the Butte itself. The 8th Battalion was to secure Diagonal Trench; the 15th and 7th were to push on to the final objective; the 6th Battalion was in support.
The attack started at 1.45 p.m. The whole attacking line came under very heavy fire from Diagonal Trench, the garrison of which were armed with automatic rifles and the full force of the enemy artillery and machine-gun fire, cleverly sited to bring a devastating cross-fire to bear along the western slopes leading up to the high ground. From across the valley the enemy had magnificent observation of the ground leading to our objective and they made full use of it.
It was well noted that not a man turned back, and some got right up under the Butte, but they were not seen again. The 140th Brigade suffered very severely in this operation, and on the following day were relieved of the left portion of their line by the 142nd Brigade. But it was found to be impossible to relieve the 6th Battalion detachment in the advanced posts, which were left in their unenviable position until the 142nd Brigade attacked past them.
On October 9th the 26th (South African) Brigade relieved the 140th and 142nd Brigades in the line. The Division had finished its part in the summer fighting of 1916. For the 140th brigade, the loss in casualties on the Somme was 296 officers and 7,475 other ranks killed, wounded, or missing.
On October 16th, Divisional Headquarters were established at Hooggraaf, near Poperinghe, and arrangements were made to take over the Bluff sector from the left brigade of the 2nd Australian Division, and the Hill 60 sector from the right brigade of the 4th Australian Division. Meanwhile, the Division was arriving from the South, the 140th Brigade reaching the Boeschepe area on the 17th October.
The Divisional area west of Ypres was a bleak and depressing slice of country, dead flat and intersected by ditches, with a few squalid clusters of houses at intervals, and covered with frequent hut-camps that required ceaseless labour to keep them drained and habitable. As time progressed these camps grew and multiplied, together with new railways, horse lines, heavy battery positions, “sausage” balloon stations, and quite adequate amenities for the men. They even had some entertainment from the “Follies” the London Regiments own concert party.
On October 19th, Major-General Gorringe took over command, the 140th Brigade taking over the Bluff and the 142nd Brigade the Hill 60 sectors. The Canadian tunnellers, however, remained, being relieved at intervals by the Australians. Mining activity on both sides was considerable, allied tunnellers claimed to have the upper hand, and subsequent events proved that this was fully justified.
No sooner was the Division set up in their positions in the surrounding craters, the enemy increased its mining activity at the Bluff. At 6 a.m. on October 22nd they blew two or three mines near craters C and D, the 6th battalion being the garrison at the time. C and D craters were destroyed and buried by the explosion, the two craters being practically blown into one, and the men were buried at the eastern end of B crater.
When the 6th was digging out the buried men, some Germans came across with a machine-gun from their trenches, which were only some fifty yards from C and D craters. The 4th Australian Division, on the south side of the Canal, fired at the raiders and inflicted some casualties, but they bombed our men and mounted their machine-gun in such a position as to command the interior of B crater. Some of the 6th escaped through the tunnel to A crater. The situation remained unchanged until night, when our reinforcements were able to reoccupy B crater.
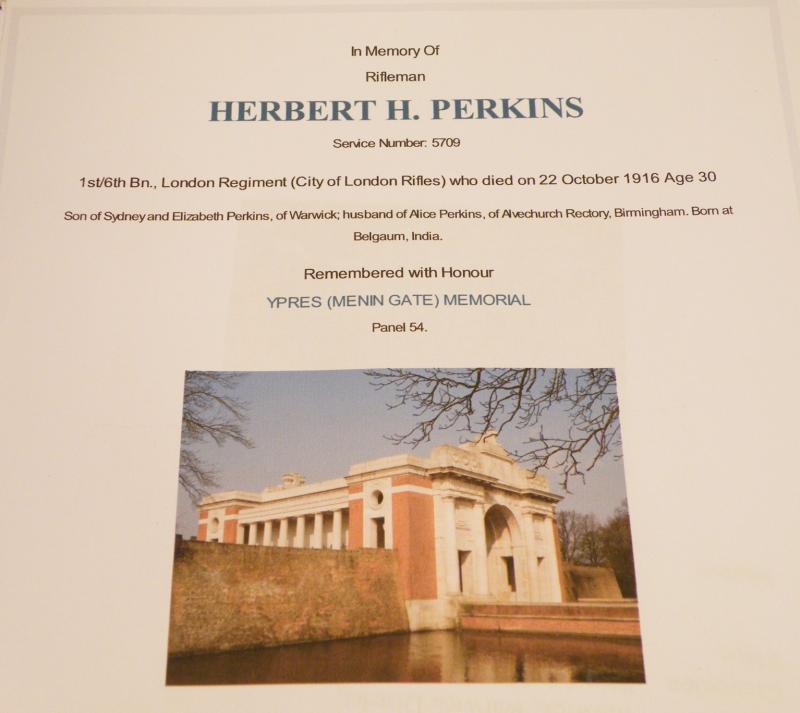
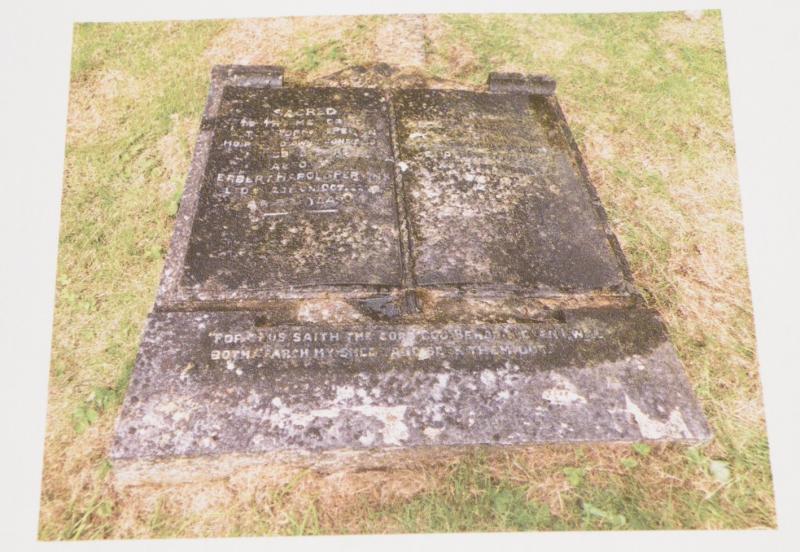
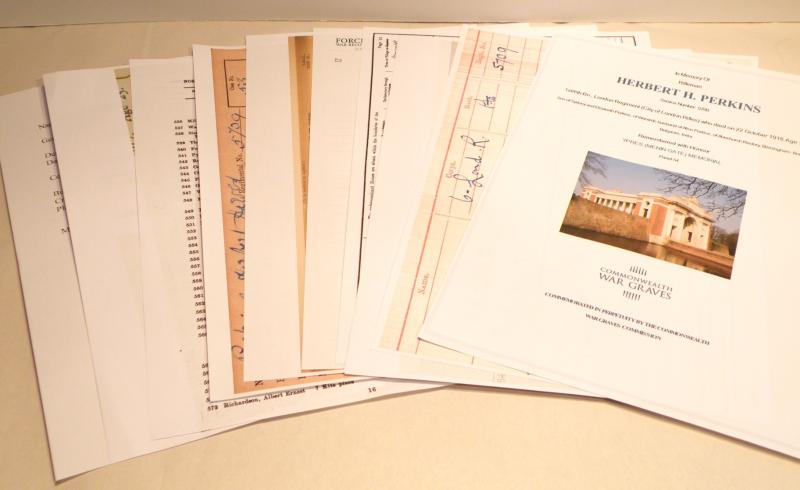
Sadly, it was here that Rifleman Herbert Perkins was killed. He is now remembered with honour at the Ypres Menin Gate Memorial. He is also remembered on his mothers and brothers grave at Warwick Cemetery.
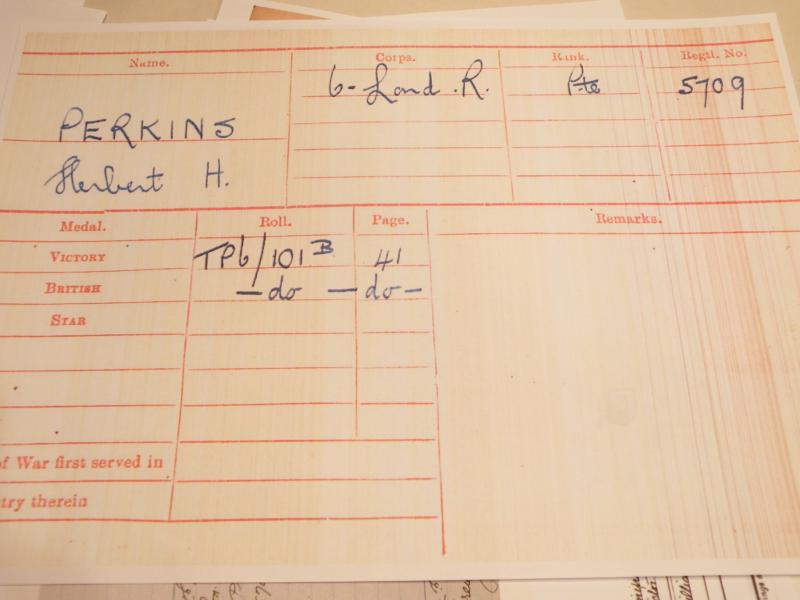
With his medal pair comes various copied paperwork including his medal index card, medal roll. Census records, Commonwealth war graves certificate etc. His medals are in excellent original condition and on original ribbons.
Code: 30739
140.00 GBP